Asset
Bipolar Attenuator & DC Source
User Manual
LIMITED WARRANTY
Vostok Instruments warrants this product to be free of defects in material or construction for three years from the date of purchase (invoice required).
During that period, any malfunctioning unit will be repaired, serviced, and calibrated on a return-to-factory basis, with the customer paying the transit cost to Vostok Instruments.
Malfunctions resulting from wrong power supply voltages, backward or reverse power connections, abusive treatment, removing knobs, or any other obvious user-inflict faults are not covered by this warranty, and regular rates will apply.
Vostok Instruments implies and accepts no responsibility for harm to persons or apparatus caused through the operation of this product.
The device intended for repair or replacement under warranty should be shipped in the original packaging only. Vostok Instruments can not take any responsibility for damages caused during transport. So before sending us anything, contact us at vostokinstruments@gmail.com.
INSTALLATION
Asset needs a power supply capable of providing 50mA on each of the +12V and -12V rails, and 10HP of free space in your case. We strongly recommend you to check the current consumption of your system on the ModularGrid website and your power supply capabilities before plugging in the module.
To install it, turn your case off and connect the supplied power cable to both the module and your Bus Board, minding the polarity so that the RED Stripe on the cable is oriented to the -12V line on both the module and the Bus Board. Please refer to your case manufacturers’ specifications for the location of the negative supply.
Always turn your case off before plugging and unplugging any Eurorack module.
INTRODUCTION
Attenuators are very useful modules on every system. Taking control over the amplitude and polarity of the signals becomes necessary when we want to have full control over our sounds.
Asset has been designed with compact systems in mind. Is small enough to not take much space on the rack but also powerful, providing six channels with individual controls over each circuit parameter. Some design decisions make Asset a different approach from the classical “Attenuverter” circuits:
The pots work in a classical unipolar way, allowing them to shut down the signal completely as you don’t need to deal with its center position. It also gives you more precision as the whole range of the pot is used either to attenuate or invert, not both.
Having manual switches to either invert the signal and the offset is useful when we just want to invert the signal, keeping its original amplitude intact.
Input chaining adds tons of flexibility to the patch allowing the use of the same signal multiple times in different ways. A perfect functionality to use on generative or polyphonic patches.
TECHNICAL SPECIFICATIONS
Size: 10HP
Current draw: +/-12V: 50mA, +5V: 0mA
Depth: 30mm (including power cable)
Input Impedance: 100kΩ
Output Impedance: 1kΩ
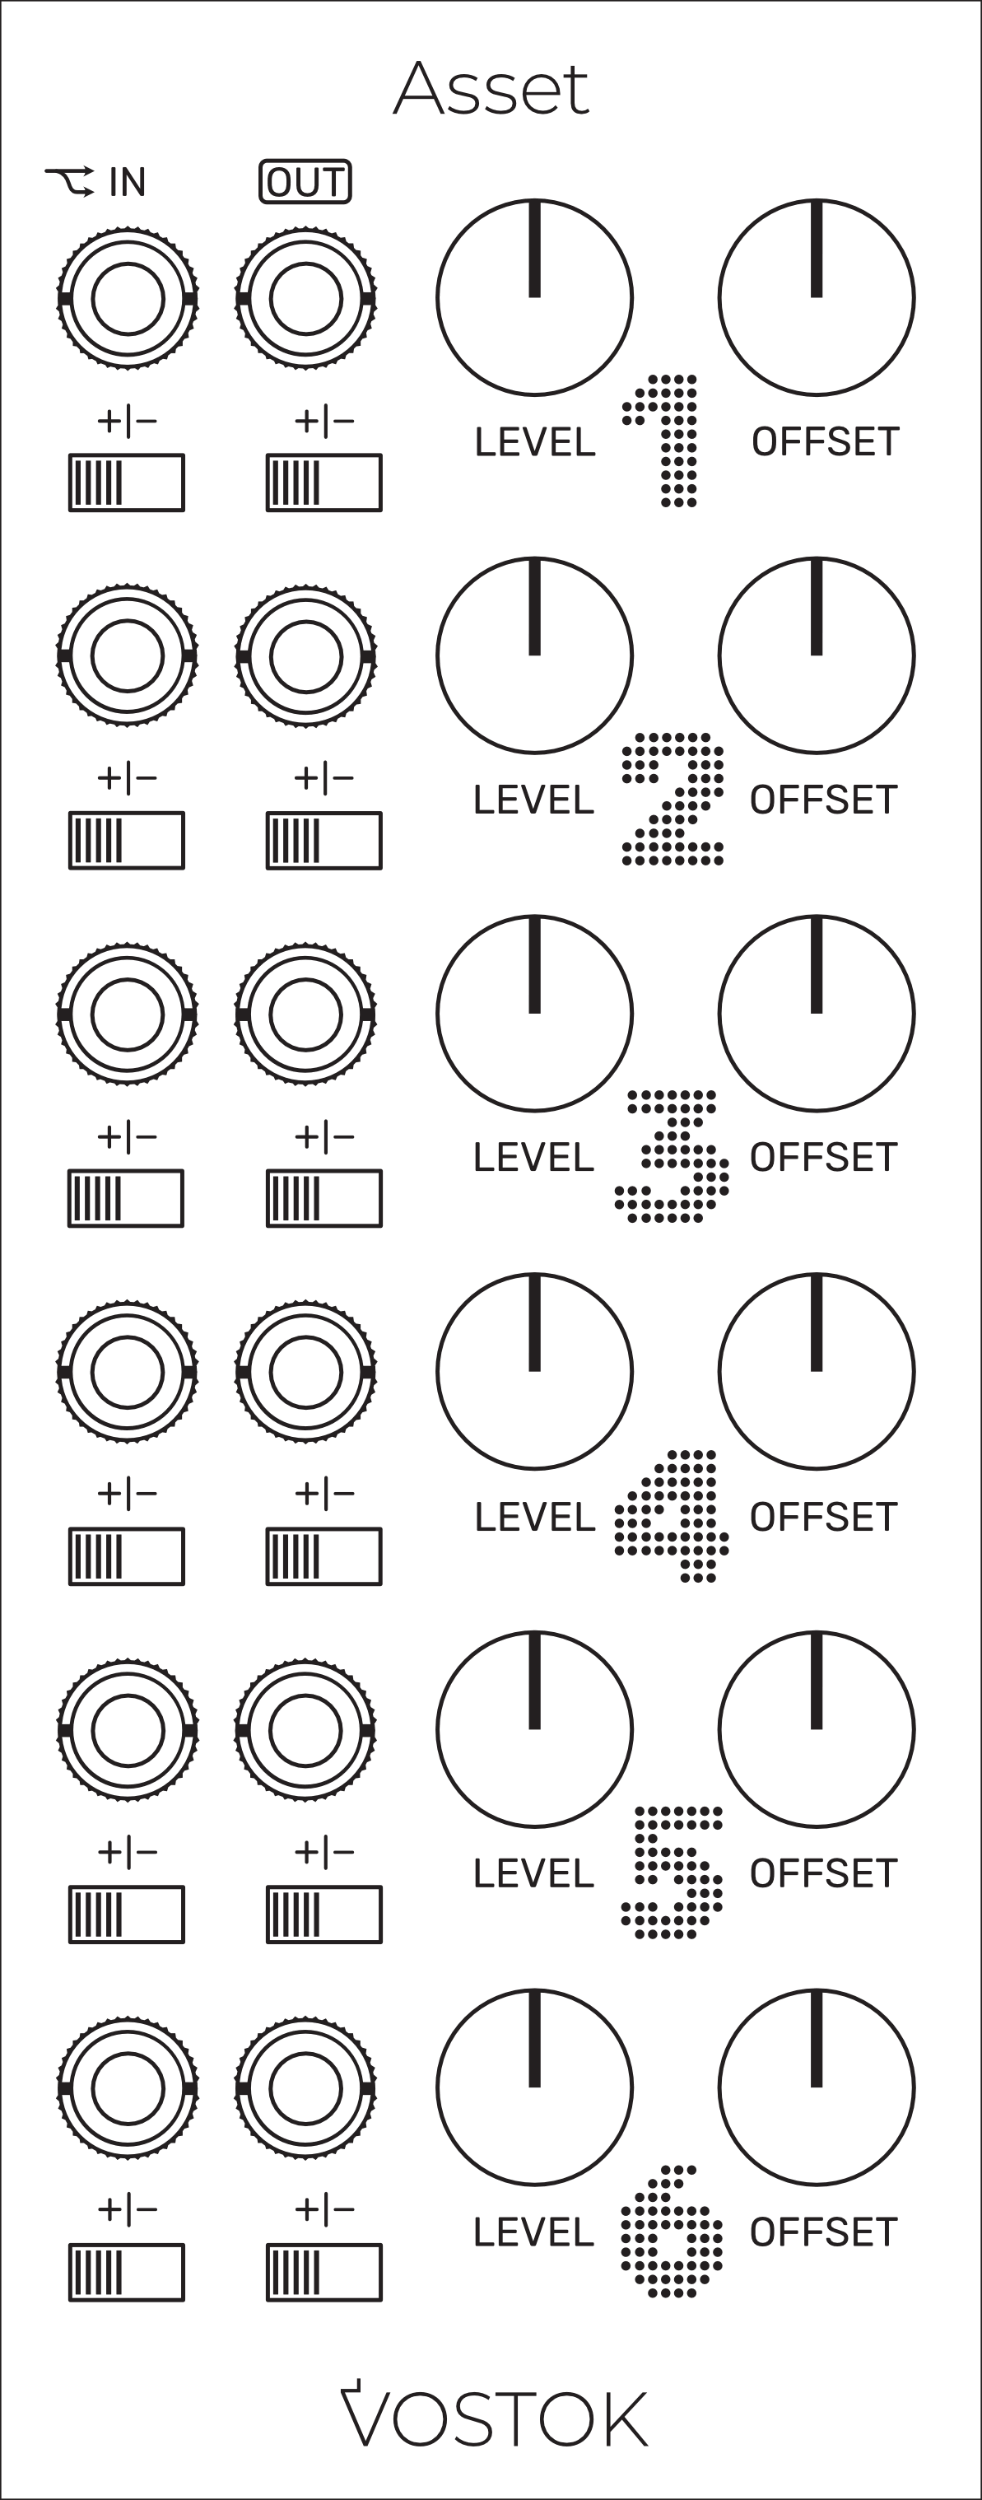
OVERVIEW

Signal Input: the signal plugged here is daisy-chained to the next channel input.
Signal Output.
Level Signal Pot: provides control over the signal amplitude.
Offset Pot: sets the amount of DC Offset applied at the output.
Channel Mode: selects between Attenuation (left) and Inversion (right)
Offset Mode: selects the polarity of the DC Offset between Positive (left) and Negative (right).
LED Signal Indicator: Orange: positive, Blue: negative.
GETTING STARTED
Asset is laid out in six identical channels of signal processing. Each channel can attenuate, invert and shift the amplitude of any signal.
As the inputs are connected with an internal daisy chain circuit, different versions of the same signal can be created easily.
Before starting patching, let’s take a deeper look at each function.
FUNCTIONAL MAP
Attenuation
Signal attenuation is the main function of each Asset channel. When a signal is present at the input, the LEVEL pot works as a tap controlling how much of the signal voltage will pass through to the output.
With the LEVEL pot at a counterclockwise position, no voltage will be present at the output. With the LEVEL pot at a fully clockwise position, the signal will pass intact, preserving its original amplitude.

Inversion
Each signal present at Asset inputs can be inverted by putting its Channel Mode switch on the minus ( - ) position.
Inverted signals switch their positive voltage into negative and vice-versa, which helps when you want to swap the direction of your modulation signal to get the opposite behavior.

DC Offset Generator
In electronics, we work with two types of signals: AC (Alternating Current) and DC (Direct Current). Simplifying things, we can say that the main difference between an AC and a DC signal is that while on AC signals the voltage value changes with the time (Frequency), on DC signals it doesn't, remaining static.
In the modular world, DC signals are part of the sound design process as they allow us to customize and correct the symmetry and voltage relation of our signals.
Each channel on Asset counts with a dedicated DC Offset generator that sums up to 10 and -10V to the output. Turning the Offset pot clockwise will gradually inject DC Offset into the output. The polarity of the DC Offset can be set with the Offset mode switch.

Daisy-Chain Operation
By default, Asset sends the signal present at each input to the next one. To break the chain, patch a cable on the desired input. This implementation allows the creation of different versions of the same modulation signal.